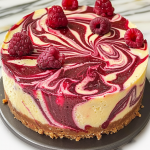
How to Make Red Velvet Strawberry Cheesecake
Let me take you on a delightful culinary journey as we dive into the steps of creating this stunning Red Velvet Strawberry Cheesecake. This recipe is like a love letter to dessert, combining the rich, velvety texture of red velvet cake with the creamy, dreamy goodness of cheesecake, all topped off with a burst of fresh strawberries. It’s truly a showstopper! Here’s how I whip up this luscious dessert in my kitchen.
Step 1: Prepare the Red Velvet Cake Base
To begin our adventure, we need to make the red velvet cake. The vibrant red color is not just for show; it pairs beautifully with the flavors of cocoa and vanilla. Here’s how I do it:
- Preheat your oven to 350°F (175°C). This is like warming up your kitchen’s heart for the magic to come.
- Grease and flour two 9-inch round cake pans. I always like to use parchment paper at the bottom for easy removal later. It’s like giving the cakes a cozy blanket!
- In a large mixing bowl, combine 2 ½ cups of all-purpose flour, 1 ½ cups of sugar, 1 teaspoon of baking soda, 1 teaspoon of salt, and 1 tablespoon of cocoa powder. Mix these dry ingredients together like a symphony, ensuring they’re well blended.
- In another bowl, mix 1 ½ cups of vegetable oil, 1 cup of buttermilk, 2 large eggs, 2 teaspoons of vanilla extract, and 1 tablespoon of red food coloring. This vibrant mixture is what will give our cake its beautiful hue.
- Combine the wet ingredients with the dry ingredients until just mixed. Be gentle here; we want our cake to be fluffy, not tough!
- Divide the batter evenly between the prepared pans and bake for about 25-30 minutes, or until a toothpick inserted in the center comes out clean. While it bakes, the aroma will fill your kitchen, making your anticipation soar!
Step 2: Make the Cheesecake Filling
While the cake is baking, let’s prepare the creamy cheesecake filling that’s going to take this dessert to the next level:
- In a large bowl, beat 4 packages (8 oz each) of softened cream cheese until smooth. It should be as fluffy as a cloud!
- Add in 1 cup of sugar and 1 teaspoon of vanilla extract. Mix until well blended. The sweetness here balances the richness of the cream cheese.
- In a separate bowl, whip 1 cup of heavy cream until soft peaks form. This will add an airy texture to the cheesecake filling.
- Gently fold the whipped cream into the cream cheese mixture. This step is like introducing two old friends; you want them to meld together without losing their unique personalities.
Step 3: Layer the Cake and Filling
Now comes the fun part—layering! After the cakes have cooled completely, it’s time to build our masterpiece:
- Place one layer of red velvet cake on a serving platter. This is the foundation of our delicious creation!
- Spoon half of the cheesecake filling onto the first layer, spreading it out evenly. The filling should be as smooth as silk.
- Carefully place the second layer of red velvet cake on top. It’s like putting a crown on a king!
- Spread the remaining cheesecake filling on top of the second layer. Don’t be shy; let it be generous!
Step 4: Prepare the Strawberry Topping
What’s a strawberry cheesecake without the strawberries? Here’s how I prepare this vibrant topping:
- Slice fresh strawberries and toss them with 2 tablespoons of sugar in a bowl. Let them sit for about 10 minutes. This allows the strawberries to release their juicy essence, creating a natural syrup.
- Arrange the strawberries on top of the cheesecake filling. I like to place them in a circular pattern for a beautiful presentation.
Step 5: Chill and Serve
Once everything is assembled, cover the cheesecake with plastic wrap and refrigerate it for at least 4 hours, or overnight if you can resist the temptation. The chilling time allows the flavors to meld, making each bite better than the last.
When you’re ready to serve, cut a slice and watch as the layers reveal themselves. The contrast between the rich red velvet, the creamy cheesecake, and the vibrant strawberries is nothing short of a culinary masterpiece!
And there you have it—your very own Red Velvet Strawberry Cheesecake! I can’t wait for you to try this recipe and share it with your loved ones. Trust me; they will be asking for seconds!
Introduction to Red Velvet Strawberry Cheesecake
Welcome, fellow dessert enthusiasts! Today, I’m excited to share with you a mouthwatering creation that perfectly marries two beloved desserts into one breathtaking masterpiece: Red Velvet Strawberry Cheesecake. Imagine biting into a slice of this dreamy delight, where the rich, velvety layers of red velvet cake embrace the luscious, creamy cheesecake filling, all topped with a vibrant medley of fresh strawberries. It’s a symphony of flavors and textures that dances on your palate!
The moment you sink your fork into this dessert, you’re greeted with the soft and tender crumb of the red velvet cake, which is subtly flavored with cocoa and a hint of vanilla. It’s like a warm hug on a plate! Then, just when you think it can’t get any better, you encounter the silky cheesecake filling that melts in your mouth, bringing a delightful creaminess that complements the cake perfectly.
And let’s not forget about the fresh strawberries! These little gems add a burst of fruity freshness that cuts through the richness of the cheesecake, creating a harmonious balance that keeps you coming back for more. The bright red hue of the strawberries perched atop the cheesecake is not just eye-catching; it also enhances the flavor profile, making it a feast for both the eyes and the taste buds.
Whether you’re celebrating a special occasion or simply indulging in a sweet treat after dinner, the Red Velvet Strawberry Cheesecake is sure to impress. It’s a dessert that sparks joy and brings people together, just like the best of memories. So, let’s dive into this delicious adventure together and discover why this unique dessert deserves a special place in your heart—and on your dessert table!
Why You’ll Love This Red Velvet Strawberry Cheesecake
Oh, where do I begin with the reasons to fall head over heels for this Red Velvet Strawberry Cheesecake? Let’s just say, it’s like a love story told through layers of cake and cream! First and foremost, the combination of rich red velvet cake and creamy cheesecake is a match made in dessert heaven. The soft, moist texture of the red velvet cake creates a beautiful contrast against the velvety smoothness of the cheesecake filling. It’s like dancing with your favorite partner—each bite is a perfect blend of flavors that just feels right.
The red velvet cake itself is a delight. It’s not just about the color; the subtle cocoa undertones provide a gentle chocolate flavor that pairs beautifully with the sweet and tangy notes of the cheesecake. When I bake it, the kitchen fills with an irresistible aroma that makes my heart skip a beat! It’s a comforting scent that invites everyone to gather around and share in the excitement.
And let’s talk about the cheesecake filling! Oh, my goodness! It’s as creamy as a cloud and rich enough to make even the most serious dessert lovers swoon. The cream cheese gives it that luscious texture, while the whipped cream adds an airy lightness, making it feel indulgent yet not overwhelming. Every spoonful is like a little slice of happiness that brings smiles to everyone at the table.
Then, we have the fresh strawberries that take this dessert to the next level. Imagine juicy, ripe strawberries bursting with flavor, adding a refreshing sweetness that perfectly balances the richness of the cake and cheesecake. When I add them on top, it’s like putting the finishing touch on a beautiful painting. The vibrant red of the strawberries not only looks stunning against the creamy white filling but also brings a pop of freshness that makes each bite feel like a celebration of flavors.
But the love doesn’t stop there! This Red Velvet Strawberry Cheesecake is versatile, too! You can serve it at birthday parties, holiday gatherings, or even as a sweet treat for a cozy family dinner. It’s a dessert that sparks joy and conversation, bringing people together around the table. Trust me, when you present this gorgeous cake, everyone will want to know your secret recipe. And you can proudly tell them that you made it from scratch with love!
So, whether you’re a seasoned baker or just starting out, this recipe is a must-try. It’s not just about the delicious flavors and stunning presentation; it’s about creating memories and sharing love through food. Each slice of Red Velvet Strawberry Cheesecake is like a warm embrace, and I can’t wait for you to experience the joy it brings!
Ingredients for Red Velvet Strawberry Cheesecake
Before we embark on our baking adventure, let’s gather our ingredients! Having everything prepped and ready feels like laying out the colors on a painter’s palette. Below, you’ll find all the essentials needed to create this stunning Red Velvet Strawberry Cheesecake, separated into three categories: the red velvet cake, the cheesecake filling, and the strawberry topping. Let’s dive in!
Red Velvet Cake Ingredients
- 2 ½ cups all-purpose flour
- 1 ½ cups granulated sugar
- 1 teaspoon baking soda
- 1 teaspoon salt
- 1 tablespoon cocoa powder
- 1 ½ cups vegetable oil
- 1 cup buttermilk, room temperature
- 2 large eggs, room temperature
- 2 teaspoons vanilla extract
- 1 tablespoon red food coloring
Cheesecake Filling Ingredients
- 4 packages (8 oz each) cream cheese, softened
- 1 cup granulated sugar
- 1 teaspoon vanilla extract
- 1 cup heavy cream, chilled
Strawberry Topping Ingredients
- 2 cups fresh strawberries, hulled and sliced
- 2 tablespoons granulated sugar
With these ingredients on hand, you’re well on your way to creating a dessert that will leave everyone in awe! It’s like gathering the finest ingredients to craft a beautiful masterpiece. I can already feel the excitement building as we prepare to bring this delicious creation to life!
How to Make Red Velvet Strawberry Cheesecake
Let me take you on a delightful culinary journey as we dive into the steps of creating this stunning Red Velvet Strawberry Cheesecake. This recipe is like a love letter to dessert, combining the rich, velvety texture of red velvet cake with the creamy, dreamy goodness of cheesecake, all topped off with a burst of fresh strawberries. It’s truly a showstopper! Here’s how I whip up this luscious dessert in my kitchen.
Step 1: Prepare the Red Velvet Cake Base
To begin our adventure, we need to make the red velvet cake. The vibrant red color is not just for show; it pairs beautifully with the flavors of cocoa and vanilla. Here’s how I do it:
- Preheat your oven to 350°F (175°C). This is like warming up your kitchen’s heart for the magic to come.
- Grease and flour two 9-inch round cake pans. I always like to use parchment paper at the bottom for easy removal later. It’s like giving the cakes a cozy blanket!
- In a large mixing bowl, combine 2 ½ cups of all-purpose flour, 1 ½ cups of sugar, 1 teaspoon of baking soda, 1 teaspoon of salt, and 1 tablespoon of cocoa powder. Mix these dry ingredients together like a symphony, ensuring they’re well blended.
- In another bowl, mix 1 ½ cups of vegetable oil, 1 cup of buttermilk, 2 large eggs, 2 teaspoons of vanilla extract, and 1 tablespoon of red food coloring. This vibrant mixture is what will give our cake its beautiful hue.
- Combine the wet ingredients with the dry ingredients until just mixed. Be gentle here; we want our cake to be fluffy, not tough!
- Divide the batter evenly between the prepared pans and bake for about 25-30 minutes, or until a toothpick inserted in the center comes out clean. While it bakes, the aroma will fill your kitchen, making your anticipation soar!
Step 2: Make the Cheesecake Filling
While the cake is baking, let’s prepare the creamy cheesecake filling that’s going to take this dessert to the next level:
- In a large bowl, beat 4 packages (8 oz each) of softened cream cheese until smooth. It should be as fluffy as a cloud!
- Add in 1 cup of sugar and 1 teaspoon of vanilla extract. Mix until well blended. The sweetness here balances the richness of the cream cheese.
- In a separate bowl, whip 1 cup of heavy cream until soft peaks form. This will add an airy texture to the cheesecake filling.
- Gently fold the whipped cream into the cream cheese mixture. This step is like introducing two old friends; you want them to meld together without losing their unique personalities.
Step 3: Layer the Cake and Filling
Now comes the fun part—layering! After the cakes have cooled completely, it’s time to build our masterpiece:
- Place one layer of red velvet cake on a serving platter. This is the foundation of our delicious creation!
- Spoon half of the cheesecake filling onto the first layer, spreading it out evenly. The filling should be as smooth as silk.
- Carefully place the second layer of red velvet cake on top. It’s like putting a crown on a king!
- Spread the remaining cheesecake filling on top of the second layer. Don’t be shy; let it be generous!
Step 4: Prepare the Strawberry Topping
What’s a strawberry cheesecake without the strawberries? Here’s how I prepare this vibrant topping:
- Slice fresh strawberries and toss them with 2 tablespoons of sugar in a bowl. Let them sit for about 10 minutes. This allows the strawberries to release their juicy essence, creating a natural syrup.
- Arrange the strawberries on top of the cheesecake filling. I like to place them in a circular pattern for a beautiful presentation.
Step 5: Chill and Serve
Once everything is assembled, cover the cheesecake with plastic wrap and refrigerate it for at least 4 hours, or overnight if you can resist the temptation. The chilling time allows the flavors to meld, making each bite better than the last.
When you’re ready to serve, cut a slice and watch as the layers reveal themselves. The contrast between the rich red velvet, the creamy cheesecake, and the vibrant strawberries is nothing short of a culinary masterpiece!
And there you have it—your very own Red Velvet Strawberry Cheesecake! I can’t wait for you to try this recipe and share it with your loved ones. Trust me; they will be asking for seconds!
Equipment Needed
Before we start mixing and baking, let’s gather all the essential kitchen tools and equipment you’ll need to create your Red Velvet Strawberry Cheesecake. Having the right tools is like having the perfect paintbrush for your masterpiece; it makes the process smoother and more enjoyable! Here’s what you’ll need:
Essential Kitchen Tools
- Mixing Bowls: A set of mixing bowls in various sizes is crucial for combining your ingredients. I usually keep a large bowl for the cake batter and a medium bowl for the cheesecake filling. It’s like having a stage for each performer in our dessert symphony!
- Measuring Cups and Spoons: Precision is key in baking, so having a good set of measuring cups and spoons will help you get the quantities just right. Trust me, it’s worth the effort to measure accurately!
- Electric Mixer or Stand Mixer: This is one of my favorite tools! An electric mixer makes whipping cream and beating the cheesecake filling a breeze. If you have a stand mixer, it’s even more convenient; just let it do the hard work while you daydream about the delicious cake!
- Rubber Spatula: A sturdy rubber spatula is a must-have for folding ingredients together and scraping down the sides of your bowls. It’s like a trusty sidekick that ensures nothing goes to waste!
- Offset Spatula: This handy tool is perfect for spreading the cheesecake filling evenly on top of the cake layers. It helps create that professional-looking finish that will impress your guests!
Baking Equipment
- 9-inch Round Cake Pans: You’ll need two of these for baking the red velvet cake layers. I always line the bottom with parchment paper to make removing the cakes easier. It’s like giving them a gentle nudge out of their cozy pans!
- Cooling Rack: Allowing the cakes to cool on a wire rack is essential to prevent them from becoming soggy. It’s like giving them a little time to catch their breath after their time in the oven!
- Plastic Wrap: You’ll want to cover your cheesecake while it chills in the refrigerator. This keeps it fresh and prevents any unwanted fridge odors from sneaking in. Think of it as a cozy blanket for your dessert!
Presentation Tools
- Serving Platter: A beautiful serving platter is perfect for showcasing your Red Velvet Strawberry Cheesecake. It’s the grand stage where your dessert will shine!
- Sharp Knife: A sharp knife is essential for cutting clean slices of your cheesecake. It ensures that each slice reveals those beautiful layers, making every piece a work of art!
- Serving Utensils: Don’t forget to have some forks and plates ready for your eager guests! After all, a masterpiece is meant to be enjoyed!
With these essential tools and equipment, you’ll be well-prepared to embark on your cheesecake-making adventure. Each tool plays a special role in creating this delicious dessert, making the process easier and more enjoyable. So, gather your equipment, roll up your sleeves, and let’s get ready to bake up a storm!
Variations
As a passionate home cook, I love experimenting in the kitchen, especially when it comes to desserts! The beauty of the Red Velvet Strawberry Cheesecake is that it serves as a fantastic base for a variety of delicious twists. Whether you’re looking to cater to dietary preferences or simply want to try something new, here are some fun variations to inspire your next baking adventure!
Fruit Variations
If strawberries aren’t your favorite—or if you simply want to mix things up—consider using different fruits for the topping. Here are a few fruity ideas:
- Blueberries: Fresh blueberries add a pop of color and a burst of tangy sweetness. They pair beautifully with the creamy cheesecake and can create a lovely contrast with the red velvet layers.
- Raspberries: Tart raspberries bring a delightful zing to the cheesecake. You can even mash them slightly to make a raspberry sauce to drizzle over the top!
- Peaches: When in season, ripe peaches are a juicy addition. Slice them thinly and arrange them on top for a summery vibe.
- Mixed Berries: For a vibrant and colorful presentation, why not create a mixed berry topping? Combine strawberries, blueberries, and raspberries for a beautiful medley!
Flavor Variations
If you want to elevate the flavor profile of your cheesecake, here are some variations to consider:
- Chocolate Drizzle: Who can resist chocolate? Melt some dark or white chocolate and drizzle it over the cheesecake before serving. It adds a rich depth of flavor that pairs perfectly with the sweetness of the strawberries.
- Coconut Whipped Cream: For a tropical twist, use coconut cream instead of heavy cream in your cheesecake filling. It adds a subtle coconut flavor that complements the red velvet beautifully.
- Nutmeg and Cinnamon: Add a pinch of nutmeg or cinnamon to the cheesecake filling for a warm, spiced flavor. It’s like wrapping yourself in a cozy blanket on a chilly day!
Dietary Substitutions
For those with dietary restrictions, don’t worry! You can still enjoy this delicious dessert with a few simple substitutions:
- Gluten-Free Version: Swap out the all-purpose flour for a gluten-free flour blend. There are many great options available that work wonderfully in baking!
- Lower Sugar Option: If you’re looking to cut down on sugar, consider using a sugar substitute like stevia or monk fruit sweetener in both the cake and cheesecake filling. Just make sure to check the conversion ratio!
- Dairy-Free Version: Use dairy-free cream cheese and coconut cream for a luscious cheesecake filling that everyone can enjoy!
Each of these variations opens up a world of possibilities, allowing you to customize your Red Velvet Strawberry Cheesecake to suit your preferences or those of your guests. I encourage you to get creative and have fun in the kitchen! Remember, every experiment is a step toward discovering new flavors and textures that could become your new favorites. So, which variation will you try first? The options are endless, and I can’t wait to hear about your delicious results!
Serving Suggestions
Now that we’ve created our stunning Red Velvet Strawberry Cheesecake, it’s time to make it shine when it comes to serving! Presentation is key, and as a passionate home cook, I believe that a beautifully plated dessert can elevate the entire experience. Here are some of my favorite serving suggestions to ensure your cheesecake looks as delightful as it tastes!
Garnish with Fresh Strawberries
One of the simplest yet most effective ways to enhance the presentation is to garnish your cheesecake with fresh strawberries. After arranging the strawberries on top of the cheesecake, consider adding a few whole berries around the base of the cake for an eye-catching detail. It’s like putting a crown on your dessert! The vibrant red color of the strawberries against the creamy cheesecake will instantly draw everyone’s attention.
Dust with Powdered Sugar
For a touch of elegance, dust the top of your cheesecake with powdered sugar just before serving. It’s a little trick that makes a big impact! The fine, snowy layer adds a beautiful contrast and gives the cake a refined look. I like to use a small sieve to evenly distribute the powdered sugar—it’s like adding a sprinkle of magic to your creation!
Add a Drizzle of Chocolate or Caramel Sauce
If you’re feeling extra indulgent, consider drizzling some chocolate or caramel sauce over the top of the cheesecake. You can either create a simple chocolate ganache by melting chocolate with a bit of cream or use store-bought sauces for convenience. The rich, glossy drizzle will not only enhance the flavor but also make your cheesecake look like it belongs in a gourmet bakery!
Serve with Whipped Cream
What’s a cheesecake without a dollop of whipped cream? Serve individual slices with a generous scoop of freshly whipped cream on the side. You can even flavor the whipped cream with a hint of vanilla or almond extract for an added surprise. It’s like a soft cloud that complements the creamy cheesecake, making every bite feel luxurious!
Use a Decorative Serving Platter
Choosing the right serving platter can make a world of difference. I love using a decorative cake stand or a colorful serving platter that complements the red hue of the cheesecake. A beautiful platter not only showcases the dessert but also adds to the overall theme of your gathering. It’s like giving your masterpiece the perfect stage!
Accompany with Fresh Mint Leaves
For an extra touch of freshness, consider garnishing your cheesecake with a few sprigs of fresh mint leaves. The vibrant green color adds a nice contrast to the red and white, and the mint aroma elevates the overall sensory experience. It’s like adding a breath of fresh air to your dessert presentation!
With these serving suggestions, you’ll be ready to impress your guests and create a memorable dining experience. Remember, the way you present your Red Velvet Strawberry Cheesecake can enhance the joy of enjoying it, making each bite feel even more special. So, roll up your sleeves, put on your creative chef hat, and let’s make this dessert not only delicious but also a feast for the eyes!
Storage and Reheating Info
After all that hard work creating your Red Velvet Strawberry Cheesecake, you might find yourself with some delicious leftovers! But fear not, my fellow dessert lover! Proper storage is essential to keep your cheesecake fresh and tasty for days to come. Let me share my best practices for storing and reheating this delightful treat!
Storing Your Cheesecake
To ensure your cheesecake remains as delicious as the day you made it, here are my top tips for storing it:
- Refrigerate: The first step is to cover your cheesecake with plastic wrap or aluminum foil. This helps prevent any fridge odors from sneaking into your dessert. If you want to take it a step further, you can place the cheesecake in an airtight container. I always find it’s best to store it in the refrigerator, where it can stay fresh for up to 5 days. Trust me; the flavors continue to meld and improve over time!
- Slice Before Storing: If you know you’ll be enjoying the cheesecake over several days, consider slicing it into individual portions before storing. This way, you can easily grab a slice whenever the craving strikes! Just be sure to wrap each slice in plastic wrap or place it in a small container to maintain its freshness.
- Freeze for Longer Storage: If you want to save your cheesecake for later, freezing is a fantastic option! Just make sure the cheesecake is completely cooled before freezing. Wrap it tightly in plastic wrap, followed by aluminum foil, to prevent freezer burn. When stored this way, it can last for up to 3 months! Just remember to label it with the date so you know when it was made.
Reheating Leftover Slices
When it’s time to enjoy your leftover slices, you’ll want to reheat them properly to maintain that delightful texture and flavor. Here’s how I do it:
- Thawing Frozen Cheesecake: If you’ve frozen your cheesecake, start by placing it in the refrigerator overnight to thaw. This slow and gentle method helps retain the cake’s moisture and texture. Avoid thawing it at room temperature, as this can lead to a soggy bottom.
- Reheat in the Microwave: For those times when you can’t wait to dig in, you can use the microwave! Place a slice of cheesecake on a microwave-safe plate and cover it with a damp paper towel. Heat it in 15-20 second intervals until it’s warm but not hot. This method helps keep the cheesecake creamy without drying it out.
- Oven Reheating: If you prefer a more even warming method, preheat your oven to 300°F (150°C). Place the cheesecake slice on a baking sheet and cover it with aluminum foil to prevent browning. Heat for about 10-15 minutes, or until warmed through. This will give you a freshly baked taste!
With these storage and reheating tips, you can enjoy your Red Velvet Strawberry Cheesecake for days (or even months) to come! Just like a great story, this dessert gets better with time and can be revisited whenever you need a little sweetness in your life. So, savor every bite, and don’t forget to share the joy with your loved ones!
Frequently Asked Questions
As I share my beloved Red Velvet Strawberry Cheesecake recipe, I often get questions from fellow baking enthusiasts. It’s always exciting to see how passionate people are about creating this stunning dessert! To help you navigate any concerns or curiosities you might have, I’ve compiled a list of frequently asked questions, along with my answers. Let’s dive in!
1. Can I substitute the cream cheese for a dairy-free option?
Absolutely! If you’re looking for a dairy-free version of this cheesecake, there are fantastic alternatives available. Look for dairy-free cream cheese brands that are made from nuts or soy. Just be sure to check the texture and flavor, as they can vary. You can also use coconut cream whipped until fluffy for that creamy consistency!
2. What if I don’t have buttermilk?
No worries! If you find yourself without buttermilk, you can easily make a substitute at home. Just add 1 tablespoon of white vinegar or lemon juice to a measuring cup, then fill it with regular milk until you reach the 1-cup line. Let it sit for about 5 minutes, and voila! You have homemade buttermilk ready for your red velvet cake!
3. How do I prevent my cheesecake from cracking?
Cracking is a common concern when it comes to baking cheesecakes, but I have a few tips to help you achieve a smooth surface. First, avoid overmixing the batter, as this can incorporate too much air. Second, bake your cheesecake in a water bath (bain-marie) to maintain even heat. Lastly, allow the cheesecake to cool gradually in the oven with the door slightly ajar before refrigerating. This gentle approach helps reduce sudden temperature changes that can lead to cracks.
4. How many servings does this cheesecake yield?
This Red Velvet Strawberry Cheesecake typically serves about 12 slices, depending on how generous you are when cutting! If you’re hosting a gathering, I recommend cutting smaller slices, as the rich flavors and textures will be satisfying enough for everyone. Plus, this way, your guests may be tempted to go back for seconds!
5. Can I use a different type of fruit for the topping?
Definitely! The beauty of this cheesecake is its versatility. While fresh strawberries are a classic choice, you can get creative with other fruits. Blueberries, raspberries, blackberries, or even a mix of berries are fantastic alternatives. You could also experiment with tropical fruits like mango or pineapple for a fun twist!
6. How long can I store the cheesecake?
If stored properly in the refrigerator, your Red Velvet Strawberry Cheesecake will stay fresh for up to 5 days. If you want to keep it longer, freezing is an option! Just ensure it’s wrapped tightly to prevent freezer burn. When stored this way, it can last for about 3 months. Just remember to thaw it in the refrigerator before enjoying!
7. Can I make the cheesecake a day in advance?
Absolutely! In fact, making the cheesecake a day ahead is a great idea. It allows the flavors to meld together beautifully and gives the cheesecake time to set properly in the refrigerator. Just remember to cover it well to keep it fresh and delicious. Your future self will thank you for this time-saving tip!
8. What can I do if my cheesecake is too sweet?
If you find that your cheesecake is a bit too sweet for your taste, you can balance it out by serving it with tart fruits or a drizzle of unsweetened whipped cream. You might even consider adding a pinch of salt to the filling to enhance the flavors and cut some of the sweetness. Remember, baking is all about personal preference, so feel free to adjust it to suit your palate!
I hope these FAQs help you as you embark on your Red Velvet Strawberry Cheesecake adventure! Don’t hesitate to reach out if you have more questions or need additional tips. The joy of baking is all about learning and sharing, and I’m thrilled to be a part of your culinary journey!
Final Tips
As we wrap up our delightful journey into the world of Red Velvet Strawberry Cheesecake, I want to share some final tips to ensure your baking experience is as successful and enjoyable as possible. After all, a little extra care can make a big difference in the outcome of your dessert. Here are my top tips for creating a stunning cheesecake that will leave everyone wanting more!
1. Allow the Cheesecake to Chill Properly
This is one of the most important steps to achieving that perfect texture. After assembling your cheesecake, be sure to cover it and let it chill in the refrigerator for at least 4 hours, or even better, overnight. This resting time allows the flavors to meld beautifully and gives the cheesecake a chance to set properly. Trust me, the wait will be worth it when you serve a slice that holds its shape perfectly!
2. Adjust Sweetness to Your Liking
Every palate is different, and what might be sweet enough for one person may be too sweet for another. As you prepare your cheesecake filling, taste it before you pour it into the crust. If you find it a tad too sweet, you can adjust the sugar to suit your preference. You can also add a pinch of salt to enhance the flavors, creating a lovely balance between sweetness and richness!
3. Use Room Temperature Ingredients
For the best results, make sure your cream cheese and eggs are at room temperature before you start mixing. This allows them to blend together more smoothly, preventing lumps and ensuring a creamy filling. I usually take them out of the fridge about an hour before I start baking. It’s a little tip that pays off in the final texture of your cheesecake!
4. Don’t Rush the Baking Process
When it comes to baking cheesecakes, patience is key. Avoid opening the oven door too frequently while the cheesecake is baking, as this can cause temperature fluctuations that may lead to cracks. Instead, keep an eye on the baking time and use the toothpick test to check for doneness. Remember, it’s better to underbake slightly than to overbake, as the cheesecake will continue to set as it cools.
5. Consider a Water Bath for a Creamy Texture
If you want to take your cheesecake to the next level, consider using a water bath (bain-marie) during the baking process. This technique helps provide even heat and moisture, resulting in a creamy, luscious texture. To create a water bath, wrap the outside of your springform pan with aluminum foil to prevent leaks, then place it in a larger roasting pan filled with hot water. Just be sure to monitor the water level as it bakes!
6. Decorate Just Before Serving
To keep your cheesecake looking fresh and beautiful, I recommend adding any toppings—like strawberries, whipped cream, or chocolate drizzle—just before serving. This way, everything maintains its vibrant colors and textures, making for an eye-catching presentation. Plus, it keeps the strawberries from becoming too soggy!
7. Embrace Your Creative Side
Lastly, don’t be afraid to get creative and make this recipe your own! Experiment with different flavor combinations, toppings, and even crusts. Whether you want to incorporate a hint of espresso, add nuts for crunch, or try a graham cracker crust instead of a traditional one, the possibilities are endless! Every twist you add can make the cheesecake uniquely yours.
With these final tips in mind, you are well-equipped to create a show-stopping Red Velvet Strawberry Cheesecake that will delight your family and friends. Baking is all about exploration and joy, so embrace the process, have fun, and don’t forget to share your delicious creations. I can’t wait to hear about your culinary adventures and the wonderful memories you create around this delightful dessert!